What Is Wood Carving?
Woodworking is a great pastime, and many people get started right away. However, before we can teach you some woodcarving tricks, you need to go over the concept for carving wood.
In short, woodcarving refers to removing some wood from logs with knives or chisels to create decorations and ornaments. While it’s simple in nature, woodcarving is actually much more complicated. There are various techniques that you can use, but you also have to focus on the wood you use and what wooden objects you want to make.
While you can start things off as a hobby and use a basic pattern, you could also turn your love of carving wood into a form of art.
When you carve wood, there are many types of wood you can use. These include various hard-woods and soft-woods. Typically, hardwood is harder to work with. Therefore, for spoon carving, softer wood is ideal than when creating a wooden sculpture that’s going to be outside.
On top of the wood you need, there are various styles of wood carving that come into play. While it is highly entertaining, you still must learn how to carve wood effectively to get the most from it. If you’re creative, carving can be a great way to spend the day.
8 Wood Carving Tools for Beginners
Now that you understand the various woodcarving techniques out there, it’s important to focus on the carving tools. There are many styles and options, but most of the woodworking tools have a basic pattern. Here are some of the common wood carving tools you need in your arsenal:
Carving Knife
Most people require a carving knife to get started. If you’re learning to carve, this is an invaluable tool for whittling and other basic carving styles. To carve wood using a knife, you scratch lightly on the flat surface of the wood to remove some of it. However, it depends on what you’re carving. Overall, you can find carving knives in different sizes and shapes based on their use.
Morakniv Knife

![]() The Morakniv Wood Carving Knife is a high-quality option and features a laminated steel blade. It’s quite small, so it fits in your hand easily. Plus, it comes with a sheath, so it’s not going to get dull or cut you when you’re rummaging around for other tools. These knives use alloy steel for the blade and have an oiled birch handle.
The Morakniv Wood Carving Knife is a high-quality option and features a laminated steel blade. It’s quite small, so it fits in your hand easily. Plus, it comes with a sheath, so it’s not going to get dull or cut you when you’re rummaging around for other tools. These knives use alloy steel for the blade and have an oiled birch handle.
Check the latest price on Amazon
Bench Knife
Whenever you’re tracing around a pattern to remove inconsistencies, a bench knife is ideal. They’re suitable for working intricate patterns and scoring, too. It’s easy to use and follows the same process as your carving knife, but you use more delicacy.
These knives also come in different sizes and designs. It’s often best to work on a flat surface when making intricate features.
BeaverCraft Bench Knife

![]()
We like the BeaverCraft because it’s suitable for many woodworking projects. On top of that, the blade is razor-sharp, and it works on all types of wood. There’s also an ergonomic handle, and it’s ambidextrous. You’re going to make great designs with this tool.
Check the latest price on Amazon
Chisel
Another basic tool you need is the chisel. Chisels have a piece of metal at one end that you hit with a hammer or mallet. The cutting edge of chisels is highly sharp and can cut large pieces of wood easily. That way, you get rid of tons of wood and make deep cuts without much effort.
Chisels can also differ a lot, depending on how they’re used. Generally, you need chisels if you’re carving in the round, chip carving, or relief carving. It’s often hard to use chisels at first, especially for relief carving. Just make sure that you’re putting light pressure on the surface and cutting out smaller chips at first.
BeaverCraft Chisel Set

![]()
Those who want the best may find the BeaverCraft Chisel Set is right for you. It comes with its own pouch and different chisel sizes. You also get sharpening tools and a stropping kit!
Check the latest price on Amazon
Gouges
Similar to the chisel, gouges are hit with hammers or mallets to work properly. However, gouges often have a different shape. There’s a concave blade on gouges to help the carver go deeper into the wood. It’s often easier to make curves and ensures that the cuts are round. Gouges aren’t easy to use, but it’s essential for relief carving. Chip carving is also something you can use here.
Instead of making chips into the surface, you’re putting in more detail and holes within the wood.
CUITASTE Gouge Knife

![]()
When you want good gouges, the CUITASTE brand is ideal. It’s bent, but it’s also durable. The sharp blade ensures that you can get through the wood effortlessly. Plus, it offers a black walnut handle, which is less likely to deform or crack.
Check the latest price on Amazon
Rotary Tool
Rotary tools are often used in relief carving. Your carvings are going to go faster with one. Plus, the carved piece may be more intricate and beautiful. They usually come with various attachments and have no limit as to what they can do.
AVID POWER Rotary Kit

![]()
The AVID POWER brand offers a durable rotary with a six-speed adjustment. You also get a flexible shaft with 107 accessories. With that, you also have a ventilation system built-in, which takes out some of the heat and lets you operate the machine for longer periods.
Check the latest price on Amazon
Electric Carver
An electric carver is small and looks like a chisel, but it’s electric. Usually, you use it for relief carving into hard-woods. In fact, many techniques can be easier with these carvers. With them, you can make many shapes, and they often come with different blade sizes to get through hardwood or something softer.
AUTOMACH Power Carver

![]()
You’re going to make beautiful carvings with less effort with this top choice. There are five blades, and it features an aluminum body. Plus, it offers reciprocating action!
Check the latest price on Amazon
Wood Grinder
If you don’t want to use a chisel all the time, a wood grinder is a great choice. It offers more precision than other power tools. Generally, they’re powerful, and they’re soft enough to use on any wood you’ve carved.
Bosch 4.5-inch Angle Grinder

![]()
While you can find a manual grinder, we like the Bosch brand. It’s compact and lightweight, so it works well in all situations. Plus, it’s convenient and durable.
Check the latest price on Amazon
Woodturner
Where carving tools are concerned, a woodturner isn’t something all carvers use. This device lets you attach a wood piece and turn it at higher revolutions. As the wood spins, you mold it. You can get many shapes, but you’re still going to have to use knives. This is great for relief carving, and the carved piece is going to get finished sooner.
Tormek TNT-808 Woodturners Kit

![]()
The Tormek brand of woodturner includes a hand kit, the woodturning kit, and a sharpening system.
Check the latest price on Amazon
My 10 Tips for Wood Carving
If you are just starting with woodcarving, you should always focus on wood carving projects for beginners. Since you want to learn how to carve wood like a pro, you are going to want a few carving tricks up your sleeve. We can help you get started! You’ve already learned about the different technique styles out there and know that carving wood is like an art. Get ready to carve with these 10 tips:
#1 Follow the Grain
Every piece of wood has a grain. If you ask any wood carving expert, they are going to say to follow the grain. You are going to see different wood grain patterns, depending on the type of wood you use. This is essential to know and learn about before you start carving.
When you go with the grain, you can remove the wood bits you don’t need, regardless of your carving method. Sometimes, going against the grain can cause wood damage or breakage. Therefore, we recommend that you always go with the wood grain.
#2 Sketch Your Carvings
Before you start any project, you want to make a draft about it, right? You’re going to have a plan in place to help with ideas and figure out what might work before you get started on your project. This is going to prevent mistakes and save you time.
When it comes to carving on wood, the same applies. You are going to have more precision and control with a better appearance when you have a plan. Before creating carvings, know which techniques you want to use or try. Begin by getting into the practice of sketching on the wood before you make your first cut. Remember: there’s no way to fix a bad cut when carving.
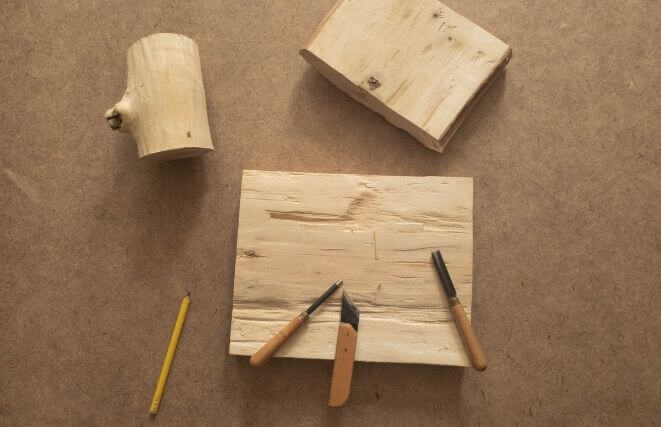
#3 Choose the Best Wood for Your Project
Before you get started on your wooden project, you have to know what wood you’re going to use. That’s also going to save a lot of effort and time.
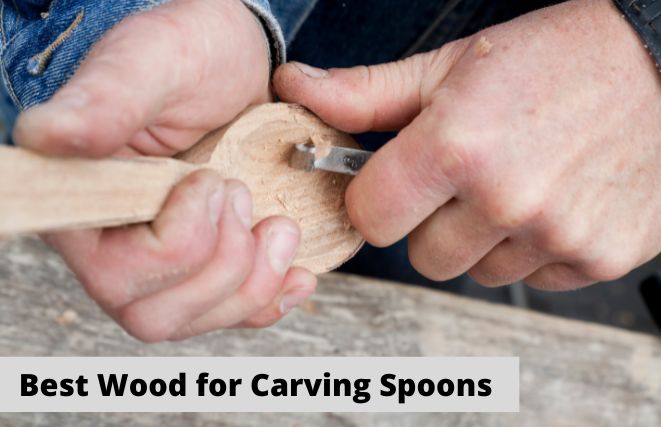
If you’re focused on using something soft, consider basswood. Whittling often requires basswood because the carved piece is still supple and looks good. Plus, it’s an inexpensive wood type.
If you’re going to be doing chip carving, consider something harder, like maple. It is tough and dense, but it’s easier to chip away at the wood with the right tools.
Those who prefer relief carving can’t go wrong with black walnut!
#4 Learn about Gouges
The right carving tools are essential when carving into wood. Before you start your project, you must know about gouges. We aren’t really talking about the gouges tool, but the shapes and sizes of the blade for the chisels.
The curvature of the gouges can vary significantly depending on what chisel you use. Some offer a nearly perfect straight cut when you use the gouges, and others have a wide size with more of a curve.
If you need more versatility when carving, we always recommend gouges that come as a set. That way, you get multiple options. These tools are going to help you make the right gouges into the wood for your finished carved piece.
#5 Sharpen Your Carving Tools
Regardless of the knife size you use, it must be sharp. All wood carving tools start that way, but they get dull as you use them. Before you get started on your next woodworking project, you should always check all the knives and chisels. Even when you’re using a power tool, such as a grinder or burr, the blade or tip must be sharp. Otherwise, you’re not going to get precise or polished results.
For your knife set, consider buying a sharpener. For the power tools you use, it’s ideal to have replacement bits and blades as needed. Regardless of the carving techniques you use, you’re always going to have the right items to help you make something amazing.
#6 Keep the Edge
Regardless of the carving method you’re using or which tools you like most, always keep the edge in sight. That doesn’t just refer to knowing where the edge is. You also have to know where it’s going. If you aim the blade of your chisel toward your hand or leg, you could get hurt. It’s a good idea to try to keep a straight line when handling your carving projects. As the carver, you should always be in full control. Many people have accidentally carved into themselves instead of the wood, causing severe injury.
When carving, you should also make sure that you’ve calculated the edge properly. If you must, use a calculator or work the numbers many times before making your first carving cut. That way, you’re going to see great results and not get hurt.
#7 Hold the Tools Properly
Never try to use power tools if you don’t know how to operate them. Most people know what carving tools they need for their projects, but it can be hard to keep them straight when you’re still learning.
On top of having the right tools, you need to know how to hold them correctly for the techniques you’re using. Whether you’re working with knives or chisels or a power carver, it takes practice to figure out where to put your hands and how to hold the piece you’re carving.
Hold it securely so that you don’t hurt yourself or damage the tools.
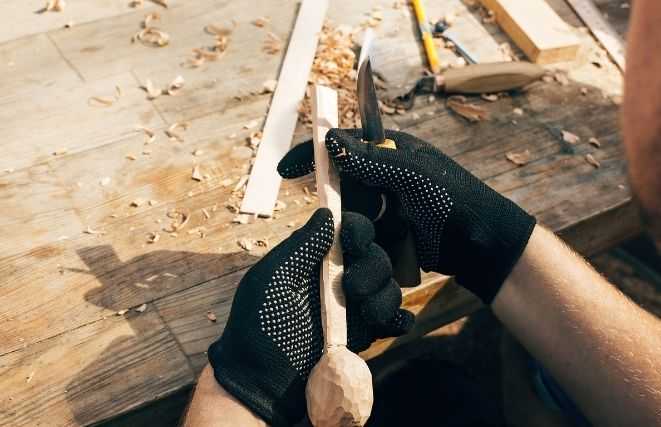
#8 Use Gloves
Use woodworking gloves for all of your projects to get a better grip on the tools and the piece you’re carving. You don’t have to spend a lot, but you should always focus on safety and preparation when you carve.
Regardless of the techniques you’re using, the carvings can get away from you while you’re working. Sometimes, you’re not going to need both gloves. You may just need it to hold the wood while you’re carving to have more grip and prevent an accident.
#9 Use the Mallet
When chip carving, you’re removing large chunks of wood, and nothing is easier to help you than a mallet. These tools may not be familiar to you, so you should understand what techniques you may require a mallet for when you carve.
If you happen to be carving on hard-woods, such as cherry and oak, you shouldn’t be scared to use the mallet. It can take practice, but you’re going to get more wood out of the piece so that you can carve what you’re making quickly.
Soft-woods work well when chip carving. However, it can be dangerous and get pretty messy. A mallet can also help when creating these carvings. Just be more careful with these projects so that you don’t mess up the carving. Usually, mallets don’t break the wood in a straight line like knives and gouges.
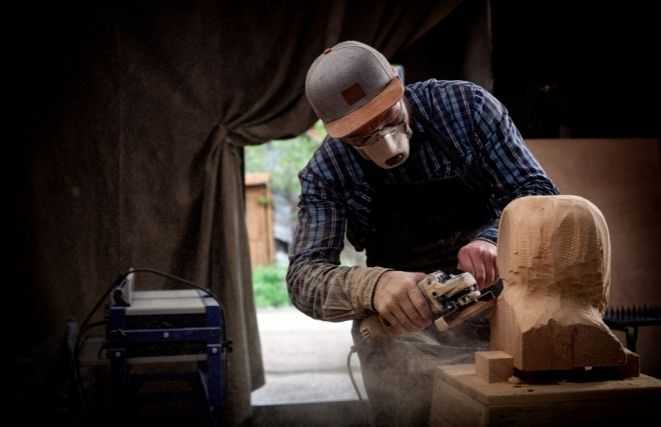
#10 Don’t Be Afraid of Power Tools.
Never be afraid of power tools! Whether you’re using a woodturner, grinder, or rotary tool, they can help you carve the wood faster and more efficiently. Most beginners don’t want to use power tools as they carve because they’re unfamiliar to them.
However, you can get a more detailed look for your carvings or drive out bigger hunks of wood with such tools. Just make sure that you practice the carving techniques you like and start with smaller projects. That way, you get a feel for the tool and know that it’s going to make life easier.
Wood Carving Styles
Now that you’re more familiar with what woodcarving is, you need to learn about the various carvings you can make. Typically, each one uses a basic technique, and you can make various projects in different styles.
Woodcarving requires specialty carving tools, and you need to know about them before you get started, too. Here are some of the wood carving methods out there:
Whittling
Most people who want to learn to carve wood begin with whittling. You need the right tools to get started, which include a knife and the basic technique. Typically, you use knives to create pointed items with this type of wood carving.
In a sense, you are using knife strokes that cut into the wood and move it away from the finished result. With whittling, you slowly create a shape on wood, which can translate into almost any objects you want.
Often, whittling doesn’t require a lot of skill to start, which is why most people start with it. You can make various wooden carvings, such as a spoon. Generally, you work with a pattern and require the right tool setup when carving wood with whittling.
On top of that, various tools are used to create the general idea, and you continue to whittle until you have the right wood carving.
Relief Carving
Relief carving is a bit trickier to get started with, but it can be quite fun. In a sense, relief carving uses wood to create sculptures, faces, ornaments, figurines, and the like.
Before you can do relief carving, you have to get experience with wood carving beforehand. It does take some skill to handle relief carving. However, the results of this technique are impressive and help you add more creativity while you carve wood.
You’re probably going to need a pattern to do relief carving, at least at first. On top of that, you need tools used to create the basic shapes. In general, relief carving requires gouges, chisels, knives, and other things. The primary focus here is to use small wooden panels or bits of wood to create a relief image. Instead of using an entire piece of wood, you’re only using a small one to carve wood.
With such a toolset at your disposal, you can create more wooden pieces than you can with whittling. Many people use relief carving after they’ve learned the basics. Experienced carvers can create intricate designs with relief carving, compared to other wood carving methods.
Carving in the Round
If you’re still a beginner, you may find that carving in the round is an easier option for you. In a sense, it’s like making things with clay, but you use wood instead.
The advantage with carving in the round is that you have a smooth, flat surface when you’re finished. In fact, this style is used to create various designs and sculptures. You may start off basic and use a pattern, but this wood carving skill can take you places. Most people find that this technique is easier to get into while you’re learning.
Carving in wood usually delivers very polished results. In fact, the sculpture might look better with this option instead of other methods. Plus, it’s quite easy to do
Chip Carving
Chip carving is a great technique, as well. However, it’s not as basic, so when you’re learning to carve, you may find that it’s a bit harder to figure out. Ultimately, you are going to use a special knife for chipping away at the wood. This also requires a hammer. The carved piece can have plenty of detail or be quite plain. In fact, chip carving is one of the hardest methods to learn.
Generally, experts use chip carving, but anyone can try this wood carving method. You’re going to need the right tool for the job and may want to start with an easy pattern, such as a spoon. Despite the difficulty in learning chip carving, you are sure to get amazing results.
In fact, you’re really just chipping away at the wood to remove various chips piece by piece. It’s going to add more creativity to the work, and chip carving is sure to leave you with a sophisticated ornament or decoration.
If you’re just starting with wood carving, chip carving might not be the option. With all the little chips and all that chipping away at the wood, you may get bored or tired. However, as you progress with wood carving, you are sure to want to try it.
Chainsaw Carving
Everyone seems to want to carve various woods and turn the wood into something amazing. The last technique we’re going to talk about is chainsaw carving. This isn’t a traditional carving method, and it’s not very easy. Still, it’s worth mentioning.
You may not ever try chainsaw carving, but we couldn’t leave it off the list because it’s so unique. As the name suggests, this method uses a chainsaw to cut through the wood. In fact, you are giving design and shape to the wooden surface. Since the tree trunk or stump isn’t flat, you may have a harder time carving the wood.
Most of the carvings done with a chainsaw are in trunk form. That way, it is easy for the chainsaw to cut into the wood without it rolling around. However, you can find basic carving-oriented chainsaws out there. They have individual carving blades and work well for small wood pieces.
It often takes a lot of skill and the right pattern to do wood carving with a chainsaw. However, the quality of the results is sure to impress. You aren’t probably going to get started with this wood carving option immediately, but it might be something to work toward.
Why Choose a Wood Carving for Beginners Kit
If you want to carve into wood, it might be best to consider a wood carving kit for beginners. They often have all of the tools you need to get started. Since woodworking is an art form, be prepared to spend many months learning and practicing so that you can carve like a pro.
Beginners should always think about the various woodcarving technique options and styles. However, if you purchase a wood carving kit, you have everything necessary. They can get pretty expensive, but once you’ve carved your first piece of wood, you’re going to be so impressed and amazed at what you made.
Conclusion – Carve Wood Like a Pro
Whether you plan to carve animals, spoons, or something more exciting, woodworking is an excellent hobby. There are various styles and techniques for woodcarving, so now is the time to learn about them. Don’t waste more time when you’ve got this guide of tips for wood carving for beginners.
Follow the tips here and learn how to carve like an expert. If you’re not sure what tools to need, you also found out about the top woodcarving tools that you need to start on your journey. Happy carving!